Calibrating the mirror touchscreen. Effective ways to calibrate the screen on Android
Actions that involve calibration include adjusting the touch screen so that the device correctly performs certain commands when you touch the sensor with your fingers. Of course, the device may well work without this procedure, but the owner should prepare for the fact that he will have to observe various kinds of failures when working with the sensor. Next, we will consider in detail the main points that are associated with calibration and the methods that allow this procedure to be carried out.
Why is calibration necessary and what can it fix?
Calibrating the screen of an Android device is most often necessary after the phone has been dropped or other mechanical damage. It is also necessary if the display had contact with liquid- this, as a rule, interferes with the sensitivity of the electrodes, despite the fact that most gadgets are equipped with capacitive screens. They replaced resistive ones and are more reliable and more sensitive.
Due to what reasons debugging required:
- the sensor does not recognize commands correctly. In this case, for example, tap works normally, but pinch or swipe can work periodically;
- The touchscreen does not always work. Actions may not be recognized and devices may ignore them;
- incorrect definition of commands. In this case, you can specify the letter “A”, and “B” will be displayed instead;
- the waiting time for a response to the action being performed has increased significantly;
- Some graphics applications may experience interruptions in highlighting certain areas of the image or lines being drawn.
Let's consider when such problems occur:
- the phone is used in over a long period of time. This is the main reason why the sensitivity of the sensor decreases; it is associated with physical factors. This also directly depends on the quality of the touchscreen installed. It is important to note the fact that such failures can occur due to prolonged inactivity;
- sensor initially incorrectly configured. To avoid problems, we strongly recommend debugging immediately after purchasing the phone. Also, after replacing touchscreen elements, calibration is required;
- viral activity and changing system settings. In some cases, incorrect operation is caused by viral activity or the user accidentally set the sensitivity parameters in the phone settings (some gadgets provide this function);
- mechanical damage screen. Scuffs, scratches, improper application of the protective film, falls and broken displays significantly reduce the sensitivity of the sensor. This item also includes screen contamination.
Calibration using Android
Debugging can be done using standard tools of the Android operating system:
Optimization using the engineering menu
The engineering menu is a hidden section for flexible configuration and optimization of the smartphone, to use it you need to:

Specialized Applications
Power Bubble
Free application for calibrating the screen of an Android device. Distinctive features of Power Bubble are its intuitive interface, easy navigation, and work on tablets and phones.
Instructions:

Important! On some devices, the program may be unstable or not respond to commands at all.
TouchScreenTune
A free program that allows you to optimize the sensitivity of your smartphone screen. It can also be used to adjust the sensitivity of the handwriting input sensor on some devices, for example, Samsung Galaxy Tab 10.1 and Asus Transformer. It should be noted that to use it you will need superuser rights. Among other things, TouchScreenTune will help you set the settings for ignoring touches. The only drawback of the program is that there is no Russian-language interface and there are glitches when using it.
Clinоmeter
A free application for Android that allows you to calibrate the accelerometer. Also Clinоmeter can accurate to a few degrees determine the angle to the surface.
Instructions:

Touchscreen Calibration
A free application for Android that allows you to calibrate and configure the sensor, debug sensitivity and response time.
Instructions:

Quick TuneUp
Free application for sensor calibration on Android devices. With Quick TuneUp you can also optimize your smartphone's battery and internal memory.
Instructions:

Display calibration
A small utility that allows you to optimize and adjust the sensitivity of the sensor. Display calibration has an intuitive interface and a range of settings on display debugging.
Instructions:

Calibration via computer
If the sensor does not respond to commands or failures occur after calibration, then in this case it will be necessary to perform optimization via a computer. To do this, we need to install the program - MSP RemoteAlignment.
Utility features:
- performing calibration without installing software on the phone;
- saving the procedure log on the computer;
- debugging the touchscreen and saving a log with the results.
After the software has been installed, we move on to the process itself:
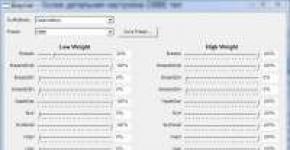
- launch the program and a window will appear on the screen with several tabs;
- Next, connect the phone to the computer using USB;
- if you need to perform automatic debugging, click the “Skip” button, and to carry out all actions manually “ Alignment»;
- After the process is completed, you can save the log by clicking the " Retrieve».
How to check the touchscreen for functionality
After calibration, you need to make sure that the touchscreen is working, you can do this as follows:
- go to the Play Market and download the Screen Touch Test utility;
- install it on your device and launch it;
- a field will appear on the main screen where you need draw a rectangle right along the perimeter of the screen;
- If the sensor operates correctly, the line will be smooth and clear, without breaks. If deviations are observed, the line is interrupted, various kinds of dots appear, this indicates that the touchscreen is unstable.
A similar function is available in the standard Android settings.
Checking and adjusting sensitivity
Additionally, you can use special features and independently adjust the sensitivity of the sensor:

How to calibrate the screen on iPhone
On an iPhone, you cannot perform the usual calibration that is done on Android. There are no special programs for this, and there is no advanced functionality in the settings. Therefore, it is only possible to carry out auto brightness sensor optimization. You can do this as follows:
- open “Settings”;
- We are looking for a room where the light is the dimmest;
- in the list of options, select the tab " Display and brightness»;
- deactivate the option " Automatic brightness»;
- A slider will appear with which you need to adjust the screen brightness; reduce the parameter to the very minimum;
- then reactivate the parameter “ Automatic brightness"and the display will become much brighter. The sensor will correct this option and move the slider to the optimal position.
Proximity sensor calibration
Proximity sensor – is a proximity sensor. This is a small device that responds to the physical proximity of the smartphone to any object. It is thanks to him that the screen turns off during a telephone conversation.
Instructions:

Program for optimizing the sensor “Proximity sensor: Reset”:
- download the program from the application store;
- click " Calibrate Sensor»;
- close the upper part of the device (the location of the sensor) with your hand and click “Next”;
- remove your hand from the sensor and click “Next” again;
- then tap “Calibrate” and confirm the execution of the actions “ Confirm" Reboot the device.
Possible calibration problems
Touchscreen optimization may not help in the following cases:
- first of all - this hardware failure phone. One option is damage to the screen with cracks created in the process. In this case, calibration will no longer help; you must contact a service center to replace the sensor;
- manufacturing defects. In some cases, we can talk about a manufacturing defect. The touch panel may fit unevenly on the glass; in some places it fits close to it, in others it does not. In this case, spontaneous operation or lack of response is observed in some areas of the screen. Here you will also have to contact the service center.
- Incorrect repair. After replacing the touchscreen, the sensor may not work or may not work well. This also includes the mirror operation of the touchscreen, when all actions and touches are reflected mirrored on the display. You won't be able to determine the problem yourself. It is better to take the device to the service center that carried out the repair. Usually in such cases the sensor is not connected correctly.
![]()
Sometimes the tablet's touchscreen or G-sensor calibration fails. The device begins to incorrectly determine the position of pressing on the screen or orientation in space. Depending on what type of display is used in your device, you can judge whether the situation can be somehow corrected. It is very easy to find out which display is in your device - just read the instructions for it, or look on the manufacturer’s website.
Resistive display sensors
Resistive touchscreens were the first to appear and were previously the most widely used. They are still used in some phones and tablets, as well as in the vast majority of car navigators. Now a little theory so that you have an idea of what kind of resistive displays these are. Try not to fall asleep while reading.
The design of such a screen is very simple - two plates, hard glass or plastic and flexible plastic, covered with a conductive layer and separated by point microinsulators. When you press on a flexible plastic plate, it bends, and at a certain point on the screen a short circuit occurs between the plates. The sensor controller measures the resistance of the plates up to this point and determines the coordinates of the press. This type of sensor has several disadvantages: low light transmission, fragility, the sensor responds precisely to pressing, and not to touch (therefore, you can control it with a regular stylus or any other fairly hard object, such as a match), the inability to detect several simultaneous presses, and also Due to manufacturing features, the parameters of the plates for each sensor may vary slightly, which causes inaccuracies in control.
To configure the controller of such a sensor, calibration is required. Usually this function is located in the display settings, called sensor calibration or touch screen settings (may be called differently, but the meaning is the same). Since I have a capacitive screen, I don't have these settings and I can't take a screenshot.
After starting the calibration, the setup program will ask you to press several times at certain points on the screen and will remember the settings. After this, the sensor readings will be adjusted in accordance with these settings, which will ensure an accurate determination of the location of the press.
Capacitive sensors
There are two main types of such sensors: surface capacitive and projection capacitive. The first ones are designed quite simply: an alternating voltage is applied to the corners of the conductive plate of the sensor, and leakage currents caused by the introduction of foreign capacitance (for example, from a finger) are checked. Based on the ratio of currents for each angle, the point of contact can be determined. These sensors do not respond to a regular stylus or gloved hand. Such sensors are quite rare, do not support multiple simultaneous touches, and also require calibration. Calibration is performed as for a resistive sensor.
Projected capacitive sensors, the most common today, have a complex multilayer design consisting of a matrix of individual sensors combined into a rectangular structure. You can control several simultaneous touches (multi-touch). Such a sensor is sometimes made directly on the glass of the screen, which reduces distortion (there is no air gap between the screen and the sensor). The controller is most often structurally integrated with the sensor itself, the parameters of which are known to it and do not require calibration. In many tablet models and rarely in phones, the controller is located on the main board of the device. Most often there are no problems with phones, but with tablets it happens that the same main board is used for screens of different diagonals, and the sensor parameters may vary.
Usually no configuration is required, but sometimes after firmware or software failures the controller may need to be calibrated. This can be done through the engineering menu (you need to figure out how to get there specifically for your model) or using special programs, such as TouchScreen Tune (available in the Google Play Market). Sometimes a capacitive sensor may not work correctly when charging due to interference from a non-original charger. There is no need to calibrate anything here - the charger goes into the garbage chute.

Accelerometer calibration (G-sensor)
This sensor, also called a gyro sensor or accelerometer, is used to determine the position of a device in space. G-sensor calculates the speed and rotation angles of the device. The simplest example of use is the “auto-rotate” function in Android and controlling games by tilting or rotating the phone (tablet). Air mouse remotes also use this sensor. Accelerometer calibration is usually not required; many games and programs allow for adjustments. It’s another matter if, after a “crooked” firmware, the accelerometer does not work at all or is difficult to configure normally. The engineering menu will help you here, there you can test and calibrate the G-sensor, or install normal firmware.
- To enter the engineering menu, hold down the volume down button and the power button at the same time, and wait until the menu appears.
- Using the volume up/down buttons, navigate through the menu and select the item Test Report, and in it - G-Sensor cali.
- Place the tablet on a flat surface and press Do Calibration (20%) until the numbers at the very top take the following form - +0.xxxx +0.xxxx +9.xxxx
- Calibration is completed, press volume up 2 times, and then - Reboot.
A short video on calibrating the G sensor (accelerometer) using the example of a Chinese tablet
Bottom line
In general, first find the reason why your display is behaving inappropriately. Don't rush to calibrate, figure everything out first. Perhaps you share lunch with your tablet, leaving grease marks or jam marks on the screen. Dispose of them carefully. It happens that a person accidentally touches the display with a finger of the hand with which he is holding the tablet, and the sensor is triggered. Just hold it differently.
Following the example of Pontius Pilate, I wash my fingers with which I typed this article and declare that all responsibility in the event of data loss or software failure lies entirely with your conscience.
Calibrating the Android screen, or rather the sensor, is a typical task; it can be done through the engineering menu. Actions that relate to the formulation - calibrating the Android screen include setting up the touch-type display in order to properly execute commands by the device by touching the sensor with a stylus or fingers. Without such a setup, the device will work, but a number of undesirable consequences will arise when operating the gadget.
Some owners of devices running the Android operating system that are equipped with touch screens may sometimes encounter the unwanted problem of “disobedience” of the screen. In other words, when you touch a certain point on the touchscreen with a stylus or finger, the gadget perceives it as a completely different command.
Or there are situations when the sensor executes commands only after the third or fourth attempt. As a rule, the cause of these problems is the incorrect operation of the screen itself, for which it is necessary to calibrate the touchscreen of the device.
 Urgent and correct calibration of the touchscreen on Android may be required in almost all cases if the smartphone has been dropped from any height, and after the device accidentally falls into the aquatic environment, this procedure is mandatory.
Also, calibration of the sensor on Android will be required after repair work on replacing the screen, the appearance of a water stain under the glass of the screen, and after suffering other, at first glance, minor damage.
To check the need for this procedure, you must perform the following steps:
- Remove the special film protecting the screen (to ensure maximum correct operation of the sensor);
- Enter any letter or number;
- If there is a discrepancy between the button pressed on the gadget screen and the information typed, setting up the touchscreen is necessary.
Basic calibration methods
Two methods are used to bring a sensor-sensor that has been knocked out of its normal position into compliance.
These main methods include:
- Using special programs for the Android system;
- Self-correction.
It should be noted that for many brands (Samsung, HTC, Nokia and other Android devices) the calibration steps are practically no different from each other and are identical.
Manufacturers of Android devices, as a rule, can use two types of sensor:
- Resistive (with a screen made using this technology, all sorts of problems very often arise, so the setting is more in demand here, but such screens are practically not used today - these systems can only be seen in budget or already outdated models);
- Capacitive (used in most gadgets, it is more reliable and of higher quality).
Touchscreen calibration using Android
If you do not have access to the Google Play assortment, the display of your Android device can be configured in another way without any problems.
Step-by-step instructions in this case might look like this:
- Go to the “Settings” menu in the gadget;
- Select “Phone settings;
- Find the inscription “Calibration, press the button;
- A cross target with a dot inside will appear on the screen;
- Click on this center of the target that appears at least three times.
After these steps, the device will automatically remember the touches. Thus, the calibration will be considered completed. After completing the setup procedure, you need to check the operation of the touchscreen by pressing a certain character on the screen, which should appear after its input.
Android screen calibration apps
You can configure the sensor using special software. The necessary software to successfully carry out this process can be found freely and freely available on the Internet.
The programs are quite simple to install and operate. But the most important thing is that you can get a positive and effective result from using almost any of them. In the Google Play store you can find free software applications such as Bubble and many others.
Application
The most popular screen calibration app on Android. Just a few taps on the smartphone screen and the screen is calibrated - you just need to restart the phone and enjoy the accurate operation of the device’s touchpad.
Application
This program has an excellent interface and also has some additional special features. Advantages of the application:
- Bubble is a free program;
- Works great with tablets and smartphones;
- Advertising can be disabled in the settings, or it can be left to encourage developers;
- Excellent graphics;
- The presence in the application of a special display that displays the angle of inclination with the highest accuracy in fractions of a degree;
- Easy to use;
- Possibility to fix the angle with a gesture or click;
- The presence of a sound signal at the zero position of the angle;
- If necessary, the ability to lock the screen orientation (horizontal or vertical);
- Ability to reinstall the application on the SD card;
- Disabling, if necessary, the “sleep” mode while the program is running;
- Using full screen mode.
Using the program is completely easy. To do this, after the initial launch, you need to select the type of device screen orientation in the settings (or set the “Auto” mode) and perform level calibration.
To do this, place the phone horizontally and press the calibration button on the left of the screen for a short time. “Calidbration” should appear on the touchscreen, and then “Wait”. The application will be ready to function when the screen displays a zero degree value.
The application is a program that allows you to configure the screen parameters of a touch device, while increasing its sensitivity and efficiency. Advantages:
- When using a protective film on the touchscreen, this application can significantly improve the sensitivity of the sensor;
- The slowing effect of using a protective film is eliminated;
- When using a device such as a stylus, some kind of tuning of the gadget becomes simply necessary with the help of this program. Using this application, you can enable complete ignoring of even palm touches (after setting, the hand can rest on the screen when using the stylus);
- If you need to use different settings, you can create separate shortcuts to quickly launch the application;
- The application has a free version.
The program is a professional tool for fine-tuning the level on an iPhone or iPodTouch. The application is used to solve ordinary problems or in more complex areas of use where the tilt of the device needs to be measured quite accurately. Advantages:
- The possibility of full-screen mode, which allows you to switch by clicking on the lower and upper arrows located in the middle of the gadget screen;
- Advanced two-way calibration allowing adjustments on surfaces that are far from level. Any direction is calibrated separately in order to obtain the required accuracy;
- Possibility of free download;
Possible calibration problems
If, however, the device is not calibrated using the method chosen for this purpose, or the application used does not give the necessary positive changes, then experts recommend trying another program; fortunately, there are quite a lot of them, software in this direction is very diverse. You can also try “Hard reboot” or in other words rebooting the device.
The last option for calibration is to contact a service center. A similar problem with the device screen can be caused not only by incorrect settings, but also by more serious reasons. In particular, in hardware failure of device elements or the presence of manufacturing defects. In this case, it is more advisable to contact specialists to troubleshoot the problem.
It should also be noted that, together with screen calibration, the gadget may need to check and adjust the screen sensitivity parameters for its subsequent high-quality operation.
TouchScreenTune optimizes touchscreen sensitivity and responsiveness. It will be especially useful in the following cases:…
Power Clean is a popular tool for optimizing the performance of Android devices. The main characteristic feature of this cleaning wizard…
Smartphones and tablets running Android OS have a similar problem for many users...