How to create a virtual disk on windows 8.1. Creating virtual hard disks in Windows
Fans of experimenting with virtual machines know firsthand about virtual hard disks. With the help of (hypervisors), you can create a virtual one inside a real computer - partly a clone of a real computer, partly with customizable parameters depending on the needs of the virtual OS being installed. However, a virtual disk can be created not only using hypervisors, but also using standard Windows 7 tools. Such a virtual disk can be used as a regular HDD partition or removable media.
1. Virtual hard disk – what is it?
The virtual hard disk in System Explorer will be no different from regular disk partitions.

But its internal structure is different - it is a file in the “.vhd” format, which must be attached to the system in order to display it as a separate disk partition. The principle is very similar to mounting disk images into the system. The “.iso” file is mounted into a virtual drive using special programs (such as Daemon Tools or Alcohol 120%) and is displayed in Windows Explorer as a regular CD/DVD drive next to the real one, which is built into the system unit or laptop hardware. Only in the case of a virtual disk file “.vhd” can you copy and transfer data to it, as to a regular disk partition. Well, you don’t need any third-party programs for mounting; everything is done, as already mentioned, using standard Windows tools.
The “.vhd” file of the virtual disk with all the data on it can be moved to another partition directory, to another disk partition, to removable media, to cloud storage. Or you can even transfer it to another computer and use it there.
2. What is a virtual disk used for?
A virtual disk, alas, in many cases will not replace a regular hard drive partition or external removable media. For example, you cannot boot from it, like from a flash drive, drive or HDD. And for the average user, it will rather serve as a separate place for conveniently organizing the internal space of the computer, rather than bring practical benefit. So, on a virtual disk you can store some important data - valuable documents, professional developments, family photo and video collections. Periodically, you can make backup copies of data from this virtual disk, like a regular disk partition, and move them to cloud storage or removable media. Instead of backing up a virtual disk to cloud storage or removable media, you can move the archive of the “.vhd” file. If the external space is not limited by the limit of free space in the cloud or the small capacity of the flash drive, the “.vhd” file can be transferred in its original form - without archiving or backup.
But this is not the most unique and indispensable use of a virtual hard disk, since you can just as conveniently organize your files on a separate non-system disk partition or in a separate folder, periodically making backup copies or archives from them for transferring to cloud storage or removable media. Virtual hard disks are usually used by those who like to study various operating systems, their versions and builds. So, you can install another version of Windows (or Linux) on a virtual hard disk and launch the second system on your computer by selecting it in the bootloader menu.
A virtual disk can be connected to both a physical and virtual OS installed on a virtual machine using programs, or. You can move files to a shared connected virtual disk on one system, and work with them on another.
A virtual disk can also be used as a storage medium for data backup, which appeared in system versions starting with the eighth.
3. Create and connect a virtual disk
To launch the standard disk management utility in Windows 7, 8, 8.1, use the command “ Execute" Let's select it in the classic menu " Start» Windows 7 or in the context menu on the corner Windows button in system version 8.1. In Windows 8, you can use the system search charm. The best way is to press the keys " Win+R" is a universal and fast way to call the command " Execute».
Enter:
diskmgmt.msc
And press the “ Enter».

The system disk management utility will launch. We need a menu at the top. In chapter " Action"Click the command to create a virtual disk.

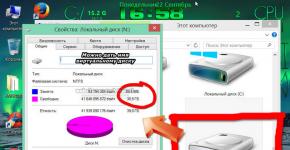
A window for creating and attaching a virtual disk will appear, where you need to specify the location of the “.vhd” file, the size of the disk and its type - fixed or dynamic. The virtual disk file format is “.vhd” - set by default.

If we create a virtual disk to store some important data on it, we select a location on a non-system disk so as not to lose files in the event of a system failure. Fixed or dynamic virtual disk? To install the OS, it is better to choose a fixed virtual disk so that the dynamic disk does not “grow” with various system updates, cache or temporary files. By the way, if the “.vhd” file is located on the system disk, then the main system may not start due to lack of space. A dynamic one is better suited for storing your data - it will grow as more files are added.
Click " OK"after setting all parameters. Next, in the Disk Management utility window, the newly created virtual disk will appear as unallocated space.

Call up the context menu on the newly created disk (on the left side of its visual display, where it says “ Disc 1") and click the option " Initialize disk" This is necessary for it to be visible in Windows Explorer.

In the window that appears, without changing anything, click “ OK».

Now we again call the context menu on the created virtual disk, but on the right side of its visual display. We need a command to create a simple volume.

Then we simply follow the instructions of the launched wizard.


Select a letter of the English alphabet to represent the virtual disk in Windows Explorer.

We agree to the proposal to format the virtual disk. If the virtual disk will be used in Windows, you do not need to change the preinstalled NTFS file system.


The virtual disk in the disk management utility will now be displayed as a full-fledged partition (volume), and the system will detect the appearance of a virtual disk as a connection to removable media.

Open Windows Explorer (or a third-party file manager). And we will see that the virtual hard disk is displayed in the same row as the real disk partitions and removable media.

You can copy files to a virtual disk, delete them, create new ones on it - do everything you can do on regular disk partitions, flash drives or SD cards.

4. Manually attach a virtual disk to display in Windows Explorer
In order for a virtual disk, like other partitions, to be displayed in Windows Explorer, it must be attached. When created and initialized, this process occurs automatically. But a previously created virtual disk or one transferred from another computer must be attached manually for visibility by the system.
Launch the system disk management utility. Open the menu “ Action" and select the command to attach a disk.

In the small window that appears, click the browse button and indicate the location of the “.vhd” file.

Now we can search for the virtual disk in Windows Explorer or in the file manager.
5. Detaching a virtual disk
If the virtual disk is no longer needed, you can disconnect it from the system and then delete the “.vhd” file itself.
Launch the system disk management utility. On the left side of the visual display of the virtual disk, call up the context menu and select the command to detach the virtual disk.

We confirm our action in the small program window that appears.

In this window you can see the path to the “.vhd” file, if suddenly over time you forget its location on the real disk. Now all that remains is to delete the “.vhd” file itself.
That’s it – the virtual disk has been removed from the computer.
Did this article help you?
Both of the above operating systems have built-in tools for creating a virtual drive, which can be used to solve a wide range of tasks, from installing the OS to creating a secure container for storing critical documents.
A virtual hard disk looks like a file with a VHD extension, which, like an ISO image, can be mounted on the system or transferred to another computer. On the other hand, when initialized, such a file appears in Explorer as a regular disk and you can also copy and move files to it without using third-party programs.
Among the abundance of possible operations, the most popular are still installing Windows on a similar drive and then launching it on a PC and using encryption programs to create virtual protected containers.
How to create a virtual hard disk
The procedures for creating and using a VHD disk in the Windows 7 and 8 operating systems are almost identical, with the small exception that in the latter case a similar file can be mounted by double-clicking the mouse.
So, the first step of this procedure is to open the Disk Management window. To do this, you need to select the appropriate menu in the Windows 8 Toolbar (Win + X keys) or enter the command “diskmgmt.msc” in the Run dialog box (Win + R keys).

Next, you need to select the “Action” item and the “Create virtual hard disk” sub-item. Please note that here you can also find the line “Attach a virtual hard disk”, which is useful for users of version 7 of Windows when transferring a file container from one PC to another.

In the wizard that opens, the user is prompted to select the location of the disk file, its size and one of the available formats (dynamic/fixed).

After clicking the “OK” button, a “blank” virtual drive will appear in the “Disk Management” window, which needs to be initialized. To do this, after clicking the right mouse button, you need to select the appropriate context menu item and then decide on the partition style (MBR is suitable for most tasks).

The next step is to select the line “Create a simple volume” from the right-click drop-down menu, where you set the volume formatting parameters, its size and name.

As a result of this simple operation, a new disk appears on the computer, which you can work with, just like with a regular HDD. However, do not forget about the location of the source file, because all data is essentially stored there.
Hello dear readers of the blog www.site. In the context of the release of a new operating system Windows 8.1 from Microsoft, it's time to remember the possibility of its installations on virtual disk VHD.
This is especially true for the trial version - Windows 8.1 Preview, since probably not many people will want to immediately install it as their main system. Officially test Windows 8.1 Preview will be available until January 15, 2014. And after the release of a working version of the system, it makes sense to try it first.
Installing Windows 8.1 Preview slightly different from other versions. The difference is that to complete its installation you must use Microsoft account. Possibility of installing the system with using a local account will return in the final version Windows 8 .1 . For now, you can create a local account only after completing installation with a Microsoft account.
The process itself installing Windows 8.1 Preview on a VHD drive in general no different from Windows 7 / Windows 8 and Windows Server. At the same time, you can choose different installation methods, as well as their combinations. In this sense, the description of methods presented in the article installing Windows 8.1 Preview on a virtual disk can be safely extended to the above versions of Windows.
First you need to prepare the following:
- Download the required Windows 8.1 Preview ISO distribution from the Microsoft website and save the installation key (the download link is at the beginning of the previous one);
- Register an account with Microsoft (if you don't already have one);
Depending on the method that will be chosen for installation:
- In the case of the traditional installation method from removable media, burn the ISO distribution image to a DVD or USB flash drive (the simplest way to prepare a bootable USB flash drive has been described);
- If you plan to deploy the system on a virtual disk using the utility ImageX, then you need to take care to obtain its current version.
You can download the updated and corrected version of ImageX from the Microsoft update page KB2525084. Updates will be sent upon request. On the page you need to open “Show fixes for all platforms and languages”, select the platform and provide an email address to receive a link to download the file.
I must say that when testing this installation option for Windows 8.1 Preview, I initially used an outdated version of ImageX and the system did not start. Perhaps it was just a coincidence and this was not the reason, but it is better to use the updated utility.
If there is only one computer, then write down the installation key and some of the commands described below that will definitely be needed during the installation process on a piece of paper in advance.
Installing Windows 8.1 on a virtual disk from bootable media
First, let’s complicate the task a little and do a “clean” installation of Windows 8.1 Preview on VHD. That is, let’s assume that initially we have a computer with a blank HDD disk, therefore, there is no operating system.
Installing Windows 8.1 in VHD on a blank disk
The practical meaning of this installation option is not very obvious; most likely, the installation will actually be carried out in parallel with the existing Windows 7 / 8. But it is very indicative from the point of view of the process itself and is therefore valuable.
We will run it in the VirtualBox virtual machine. I didn't make a mistake. If anyone doesn’t know yet, virtual disks can be nested one inside the other.
For clarity, we will create the main disk of the virtual machine, corresponding to the hard disk of a real computer, in the VDI (VirtualBox Disk Image) format, and the subdisk on which the operating system will be installed, in the VHD (Virtual Hard Disk) format.
From now on, you can safely forget that all the examples shown below were made in the VirtualBox virtual machine - they are no different from a real computer, except for the disk sizes (for testing, I created a dynamic VDI disk with a capacity of 25 in the corresponding Windows 8.1 virtual machine GB).
We boot the computer from a USB flash drive or DVD with the system distribution kit (in a virtual machine from a virtual optical drive). On the very first screen, change the “Input method (keyboard layout)” from “Russian” to “USA”. “Next” -> “Install”.
Enter the product key, accept the license terms, and on the installation type selection screen, check “Custom: Windows installation only...”.

Click “Create”. Select the partition size on which the virtual disk with Windows 8.1 will be placed. “Apply.” We agree with the installer’s warning that Windows may create additional partitions to ensure proper operation...” We are talking here about the first partition “Reserved by the system” with a size of 350 MB.
In Windows 7, the size of this partition was 100 MB. As we have already discussed, an increase in the volume of the partition was done in Windows 8 to transfer the “Recovery” folder to it.

If not the entire disk is allocated for the system, then its unallocated area will still be present in the list.
As everyone has already noticed, up to this point the installation did not have any special features. Now we need create and attach a virtual disk.
Select the main created partition (in the example – Partition 2) and click “Format”.
After formatting is complete, launch the command line using the key combination “ Shift + F10" If the Russian keyboard layout was left at the first installation step, switch it to English using “ Alt+Shift" We dial:
diskpart
list vol 
Find the volume number on which the virtual disk will be located. In our case – “2”. Let's continue:
select vol 2
create vdisk file=D:\Windows81p.vhd maximum=21760 type=expandable The disk name (letter) in your case may be different, the name of the vhd disk is arbitrary, the size of 21.7 GB in the example was chosen to leave 15% free space on the main volume.
After creating a new virtual disk, connect it to the system:
attach vdisk
After the message about the successful connection of the disk, type twice:
exit
and return to the disk selection screen:

Click “Update”. “Unallocated space on disk 1” appears in the list. This is the newly created and connected virtual disk. We switch the focus to it, ignore the warning that Windows cannot be installed on it and click “Next”. The Windows installation process begins, which is no different from installation on a regular hard drive.
After its completion, you can make sure that with this installation method, the structure of the placement of system files and directories is no different from the system installed directly on the hard drive. The only difference is that the quality boot partition is used virtual disk.
To verify this, go to the Windows 8.1 system installed on the virtual disk and click “ Win+x" In the list that appears, select “Disk Management”. Select the “Reserved by the system” section and assign any free letter to it, for example “S”.
This is not enough to see the contents of the first system partition. Press “Win + x” again and go to “Control Panel” -> “Folder Options”:

On the “View” tab, enable the visibility of hidden and protected system files.
Now you can make sure that the download control ( bootmgr) remains on the system partition of the hard drive, and the Windows boot loader ( winload) is located on a virtual disk. We will return to loading management a little later.
Interestingly, the “Recovery” folder suddenly appeared on the C:\ drive again. What is it for?
Installing Windows 8.1 on a virtual disk from bootable media in addition to the existing system
In fact, we have already described this installation option above. There is practically nothing to add to it, but new opportunities appear. For example, a virtual disk can be created in advance on the main Windows 7/Windows 8 system.
To do this, open “Computer Management” -> “Disk Management” -> “Create a virtual hard disk”:

A similar result can be achieved on the command line using the utility diskpart. To do this, you need to launch the command line as an administrator and run the commands already given above.
The virtual disk created in the GUI or on the command line can only be connected using diskpart at the very beginning of installation from removable media.
The main thing is to remember, or first write down, the path and the name that was assigned to it when created in the main system.
It is advisable to connect the virtual disk immediately after entering the product key. Click “ Shift + F10” and repeat all the commands described above with the exception of:
create vdisk file=
Next, almost everything is the same as in the version with installation on a blank disk. Create and format none sections, naturally, no need.
The method of installing Windows on a VHD from bootable media seems to be the simplest and most natural. In this case, however, you will need to make a bootable USB flash drive or burn a DVD.
Create a bootable Windows virtual disk using Disk Utilities from a .wim image file
In addition to directly installing Windows on a virtual disk, which we learned about in the first part of the article, you can burn the system to a VHD using disk utilities Disk Management Tools.
It is assumed that by this moment there is the necessary distribution kit with Windows 8.1 and using any of the methods described above, a new virtual disk with a size sufficient for the installation and operation of the system has been created.
Since the operation of copying files to a virtual disk is ahead, it must be formatted.
This can be done in “Computer Management” -> “Disk Management”. You need to “Attach a virtual hard disk” and then format it to the NTFS file system.
On a command line running as administrator, this can be done using diskpart.
diskpart
select vdisk file=D:\Windows81p.vhd
attach vdisk
create partition primary assign letter=V
format quick FS=NTFS label=VHD
exit
Accordingly, the drive letter and the name of the assigned label may be different.
You can offer various options for solving the problem. Let's start with the utility ImageX.
Preparing a bootable virtual disk using the ImageX utility
How to get the latest version of ImageX was described above.
First, you need to extract the file from the ISO image of the operating system distribution and place it on any existing computer disk Install.wim. Its size is about 3 GB. This can be done, for example, using free archivers 7-Zip or Hamster.
If you have a bootable USB flash drive or DVD with the system, you can use Install.wim directly from removable media.
The command to write Windows boot files from the Install.wim image to a virtual disk looks like this:
imagex/apply<путь до файла.wim> <индекс образа> <путь до файл.VHD>
Information about the images recorded in .wim and their indexes can be found with the command:
imagex/info<путь до файл.wim>| more
The Windows 8.1 trial .wim file contains two images:
- Windows 8.1 Professional Preview;
- Windows 8.1 Preview.
Let's use, for example, the image with index “1”.
Finally, assuming that the Install.wim file is located in the root of the F:\ drive, for our example the command would look like this:
imagex /apply F:\Install.wim 1 D:\Windows81p.vhd
If the created virtual disk is connected to the system, for example, to the letter V:\, then you can do this:
imagex /apply F:\Install.wim 1 V:\
Next, all that remains is to wait for the operation of deploying the image to the virtual disk to complete and disable it in “Disk Management” or with the following commands:
diskpart
select vdisk file=D:\Windows81p.vhd
detach vdisk
exit
Preparing a bootable virtual disk using the Install-WindowsImage.ps1 script
An alternative to the one just discussed is to use PowerShell script Install-WindowsImage.ps1. In fact, the meaning of the process does not change at all, it’s just that instead of ImageX, one might say, another utility is used.
Download Install-WindowsImage.ps1 available on MSDN. After saving the script on your computer, you need to go to its properties and unlock it:

You may also need to change the PowerShell execution policy to run the script. To do this, launch PowerShell with elevated privileges (“Start” -> “All Programs” -> “Accessories” -> “Windows PowerShell”. In the “Windows PowerShell” context menu, right-click “Run as administrator”).
In the window that opens, write the command:
Set-ExecutionPolicy RemoteSigned
We confirm our desire to change the execution policy.
Now you can do all the necessary operations without leaving the PowerShell window.
See what images are recorded in .wim:
<путь до Install-WindowsImage.ps1>–WIM<путь до файла.wim>(to simplify the commands, the script has been moved to the root of the C:\ drive. This is not necessary.):

Deploy the selected image to the previously created and attached virtual disk:
<путь до Install-WindowsImage.ps1>–WIM<путь до файла.wim>-Apply –Index
Let's assume that the virtual disk is mounted as drive V:\. Then for our example the command will look like this:
C:\Install-WindowsImage.ps1 –WIM E:\Install.wim –Apply –Index 1 –Destination V:\
As in the case of using ImageX, all that remains is to wait for the operation to complete and unmount the virtual disk.
Adding Windows 8.1 installed on a VHD to the main system boot menu
A new bootable virtual disk with Windows 8.1 (or Windows 7/8), created using one of the methods described above, now needs to be connected to the main system boot loader menu.
If you manually add a section with the necessary records about the new boot option to the BCD system storage (how to do this was described in the section dedicated to editing BCD content, and it contains a description of the necessary commands), then the next attempt to launch Windows 8.1 Preview from the virtual disk will fail.
To run Windows 8.1, you need to update the bootloader files themselves (bootmgr, etc.), usually located in the first “System Reserved” partition of the physical hard drive.
You can do it like this. While in the main system, connect a ready-made virtual disk with Windows 8.1. Then, at an elevated command prompt, run the following command (assuming the virtual disk is mounted as V:\):
bcdboot V:\Windows /l ru-RU
As a result bcdboot Not only will it copy the new files to the system partition, but it will also add system writes to the boot configuration data (BCD) store that are responsible for booting the new system from the virtual disk.
Now everything works and after a reboot a new graphical menu should appear:

Finally, you can change the order in which boot options are displayed and make the main system boot by default and change the selection timeout.
Installation on a virtual disk is interesting because it allows, without any manipulation of hard disk partitions, to obtain an absolutely complete system (or several) for testing and evaluation on real hardware.
And again intelligibly, Alexander has a gift for rational and concise presentation. I also didn’t immediately appreciate the meaning of the manipulations, but after thinking I came to the conclusion that in some cases VHD is in demand.
Great article, thank you.
How can I test another version of Windows without reinstalling the existing system? One such method is to install a new system on virtual hard disk
– file format VHD, a virtual analogue of a physical hard drive, located on the same hard drive, but simulating its own disk structure. The method of installing Windows 7, 8.1 and 10 on a virtual VHD disk will be discussed below.
But first, let’s look at the benefits of installing a second system on a virtual VHD disk.
VHD disk, another disk partition and a virtual machine: what's the difference?
Full work with operating systems, in particular with the latest versions of Windows – 7, 8.1, 10, on virtual machines is only possible if you have a powerful computer. Plus, you need to understand that hypervisor programs like VMware Workstation or VirtualBox– this is not just another YouTube video downloader, and you still need to understand the functionality of such programs first. Whereas installing the OS on another disk partition or on a VHD disk does not require special computing power. Operating systems will not work one inside the other, and each of them, functioning separately, will be able to use the computer's resources to the fullest. And the load on the human brain is limited only by the peculiarities of choosing a location during the installation of the second system.
Installing Windows on another disk partition is not much different from installing it on a virtual VHD disk. In both the first and second cases, the installed system will take up exactly as much disk space as it needs. Whereas, for example, VMware Workstation virtual machines with a certain amount of virtual space actually take up almost half as much space on the hard drive of a physical computer.
There is no fundamental difference in the process of uninstalling Windows installed on another partition and on a virtual VHD disk. In both cases, you need to remove Windows from the boot menu in the system configuration section, then destroy the files themselves. The VHD file is deleted with the Delete button, like any other file, and the disk partition is formatted.
What are the benefits of installing an operating system on a VHD disk?
In fact, in comparison with installing Windows on another disk partition, installing the system on a virtual VHD disk has only two advantages, and the second can be considered as such only conditionally.
First advantage- this is that there is no need to bother with allocating a separate disk partition for the new system. After all, a VHD file can be created on any of the existing partitions, in any of the folders, and the new operating system will be neatly placed there.
Second advantage (that very conditional one) – this is the ability to move a VHD file without harm to the installed operating system. A VHD file with Windows installed can later be moved to other partitions or other hard drives (including external), other computer devices. Why is the advantage conditional? The fact is that after moving the VHD file, the bootloader, naturally, will not be able to independently determine the location of the operating system. Likewise, the bootloader of another computer will not be able to see the new system if you suddenly take and place a VHD file with Windows on it. You will need to edit the bootloader, and this is still dancing with a tambourine.
Installing Windows 7 and 8.1 on a VHD disk
To install Windows 7 and 8.1 on a VHD disk, you will need exactly the same DVD or bootable flash drive with the system distribution as for a regular installation. The only condition is that it should not be an assembly with reduced system functionality. It is advisable to use clean system images.
We boot from removable media and in the welcome window of the system installer click "Further".
Select system installation.

When choosing the installation type, click full.

We get to the menu for selecting disk partitions for the system being installed. We need command line , with the help of which we will carry out the necessary operations to create and display VHD -disk among other computer partitions. Press the Shift + F10 keys to call it.

In a command line environment - regardless of whether it is a Windows 7, 8.1 or 10 installation disk - switching to the English layout is done using the Shift + Alt keys.
The sequence of commands entered in our case will be as follows:
create vdisk file=”D:\OS7.vhd” type=fixed maximum=25600
select vdisk file=”D:\OS7.vhd”

In each individual case, only the second and third commands will differ.
First team — "diskpart"— used to call the computer's disk management utility.
Second – this is the command to create a virtual disk. Meaning "D:\OS7.vhd" we created VHD -file on disk D computer. Meaning type=fixed we installed the virtual disk fixed type. If you need a dynamically expanding virtual disk type, instead type=fixed must be entered type=expandable. Meaning maximum=25600– this is the size of the created virtual disk in megabytes. Our case is a test case, so the minimum volume was chosen - just 25600 MB (25 GB) . The next command must be started after this one has been successfully completed. We have to wait 100% completing the virtual disk creation process.
Third– virtual disk selection command. In each individual case, only the path will differ VHD-file. In our case, this is, accordingly, the value "D:\OS7.vhd".
Fourth– command to attach a virtual disk (mounting it into the system).
Once the virtual disk has been successfully attached, the command prompt window can be closed. Let's return to the partition selection menu for installing the system, here you need to press the button.

After this, unallocated space with the size of the virtual disk we created will appear among the disk partitions. Select this unallocated space, ignore the notification that Windows supposedly cannot be installed on such a partition, and click "Further".


After restarting the computer, we will see the boot selection menu. In our case, Windows 7 was installed last, so the bootloader will be in its format.

The Windows 8.1 and 10 boot menu is much nicer.

If the same version of Windows is installed on both the disk partition and the VHD disk, the virtual systems will be indicated by an icon with the file type VHD and indicating volumes installations.

We are going through the initial computer setup procedure.

Installing Windows 10 on a VHD disk
The process of installing Windows 10 on a VHD disk will be exactly the same as in the case of its predecessor versions, with the exception of one small nuance. In the command line when creating a virtual disk, the value of its type is fixed or dynamically expandable – need to be swapped with the size value. That is, after the placement path VHD-file, first enter the value maximum=number_megabytes, then only - type=fixed (or type=expandable for a dynamically expandable disk) . In our case, installing Windows 10 on a VHD disk was accompanied by the following commands on the command line:
create vdisk file=”E:\w10.vhd” maximum=25600 type=fixed
select vdisk file=”E:\w10.vhd”

Setting the default system boot
Once in the environment of the installed system, we can (if necessary, of course) configure the loading order of the operating systems available on the computer. Whether it's installation on another disk partition, whether it's installation on a virtual VHD-disk – in any of these cases, the default boot will be the latest installed Windows. You can return boot priority to the first system and configure the display time of the bootloader menu in the section configurations. Press the Win + R keys to launch the utility "Run", enter the command, press Enter.

In the configuration window that opens, go to the tab. Select the desired system to boot by default, press the button "Use as default". Also in the column "Time-out" we can change the preset half a minute to select a system, reducing the time allotted for reflection. After all installations, click "Apply" And "OK".


Removing Windows installed on a VHD disk
There is nothing easier than getting rid of unnecessary Windows installed on VHD-disk. As already mentioned, this requires two simple steps. First– delete the VHD file.

Second– delete the boot entry in the system configuration section.

In appearance, a virtual hard disk is indistinguishable from a regular computer disk partition. But, unlike the latter, a virtual disk is a file in the “.vhd” format, which is physically located on a real disk partition. After joining the system, the virtual disk can be seen in Windows Explorer and file managers as a regular disk partition. If, for example, a separate disk partition is needed temporarily, so as not to waste time on partitioning the hard disk with special software, it is easier to create a virtual disk. On it, like on a regular disk partition, you can place user files and install programs, but the process of creating a virtual disk is both faster and easier than working with partitioning a hard disk. If there is a need to hide some files from third parties, the display of the virtual hard disk can be disabled at any time.
By connecting a virtual disk to a virtual machine created using a hypervisor, large amounts of data can be moved from a physical computer to the latter.
Finally, the virtual disk can be used to install another operating system on it. If you need it temporarily, for example, for testing, and there is no other need for a separate disk partition, you can install the operating system on a virtual disk. Below we will look at the process of creating a virtual disk using standard Windows 8 (10) tools.
How to create and attach a virtual hard disk
To create a virtual hard disk, call the “Run” command (you can use the Win+R hotkeys for this) and enter the command:
diskmgmt.msc
Click “Ok” or the Enter key.
The Disk Management utility will appear. In the “Action” menu we need the “Create virtual hard disk” command.

In the window that appears, specify the folder on the non-system disk partition where the “.vhd” format file will be stored - actually, the virtual disk file. We give a name to this file, select the type (fixed or dynamic) and determine the size of the virtual disk. If we are talking about creating a virtual disk on the system partition of a computer disk, it is better to choose a fixed size and limit it to avoid cluttering the system disk in the future. It may happen that the dynamic virtual disk you are expanding will grow in size, causing system performance to degrade due to lack of space for Windows tasks. Having set all the parameters, click “Ok”.

After this, we will return to the Disk Management utility window, and the newly created virtual hard disk will be detected as unallocated space. The virtual disk must be initialized to communicate with the system. After that, it will be visible in Windows Explorer. Among other partitions on a computer disk, a newly created virtual disk is easiest to determine by its size. In our case, it appears as “Disk 3” in the Disk Management utility. Right-click on this inscription and select “Initialize disk”.

In the next window, in most cases you will need to leave the default MBR boot signature option. Click “Ok”.

Let's go back to the disk management utility. Now you need to create a virtual disk into a separate volume. We call the context menu, but on a visual display of the unallocated space. Select the first command - “Create a simple volume”.

Then all we need to do is follow the instructions in the Create a Simple Volume wizard.


We assign a Latin letter to display the drive in Windows Explorer and file managers. Click “Next”.

We leave the preset option for formatting our virtual disk in the NTFS file system. Click “Next”.

That’s it – click “Done”.

After this, the virtual hard disk can be seen in Windows Explorer as a separate disk partition.

How to properly remove a virtual disk
To delete a virtual disk, you must delete its “.vhd” file. But first, we will disconnect the virtual disk from the system so that it is not visible in Windows Explorer. In the disk management utility, select our virtual disk, right-click and press the disconnect command.

Next we will see a small window that will warn us against possible loss of data that is on the virtual disk. If all the important data from the virtual disk has been moved to the right place, feel free to click “OK”.

That’s it – now all that’s left is to delete the “.vhd” file from the regular disk partition where it is physically located.